
How to install a free SSL certificate on a Namecheap website?

How to Install a Free SSL on a Website in Namecheap
To install a free SSL certificate on your Namecheap website, you can use Let's Encrypt, which is a free, automated SSL certificate provider.
If you want to learn how to install a free SSL certificate on a Namecheap website, follow these steps.
Helping Video
Using Namecheap’s Free SSL
1. Log in to Your Namecheap Account
- Go to Namecheap.
- Log in to your dashboard.
2. Activate Free SSL
- Navigate to "Dashboard" > "Products".
- If your domain qualifies, a free SSL certificate will be provided under "Free Products".
- Click "Activate" and follow the instructions to link the SSL to your domain.
3. Complete the SSL Installation
- If you utilize Namecheap hosting, the SSL certificate will be installed immediately.
- If you are hosted elsewhere, download the SSL certificate and upload it to your hosting provider.
Related topics you may enjoy: what is Git and how to use it?
Using Let’s Encrypt for Free SSL
If you want a free SSL other than from Namecheap, take these steps:
For cPanel Hosting
1. Log in to Your cPanel
- Access cPanel via Namecheap or your hosting provider.
2. Go to the Let’s Encrypt Section
- Find Let’s Encrypt or SSL/TLS in cPanel.
3. Select Your Domain
- Select the domain where you wish to install SSL.
- Click Install SSL.
4. Verify the Installation
- Ensure the website loads securely via https://.
For Non-cPanel Hosting
1. Install Certbot
- Connect to your server via SSH and install Certbot for Let's Encrypt.

2. Run Certbot

Or, for NGINX

3. Follow Instructions
- Complete the steps to set up SSL for your domain.
SSH Terminal Commands
1. For generating the ACME script
- ls : List files
- pwd : Print working directory path
- .acme.sh/acme.sh --issue -d YourDomainName.com -d www.YourDomainName.com -w /YourDomainDirectoryPath --server letsencrypt
2. For installing an SSL certificate
After generating the ACME script, you will see a new folder ".acme.sh" in your file manager.
Inside the ".acme.sh" folder you will see another folder "YourDomainName.com_ecc".
There will be the following files inside the "YourDomainName.com_ecc" folder.
- YourDomainName.com.cer
- YourDomainName.com.key
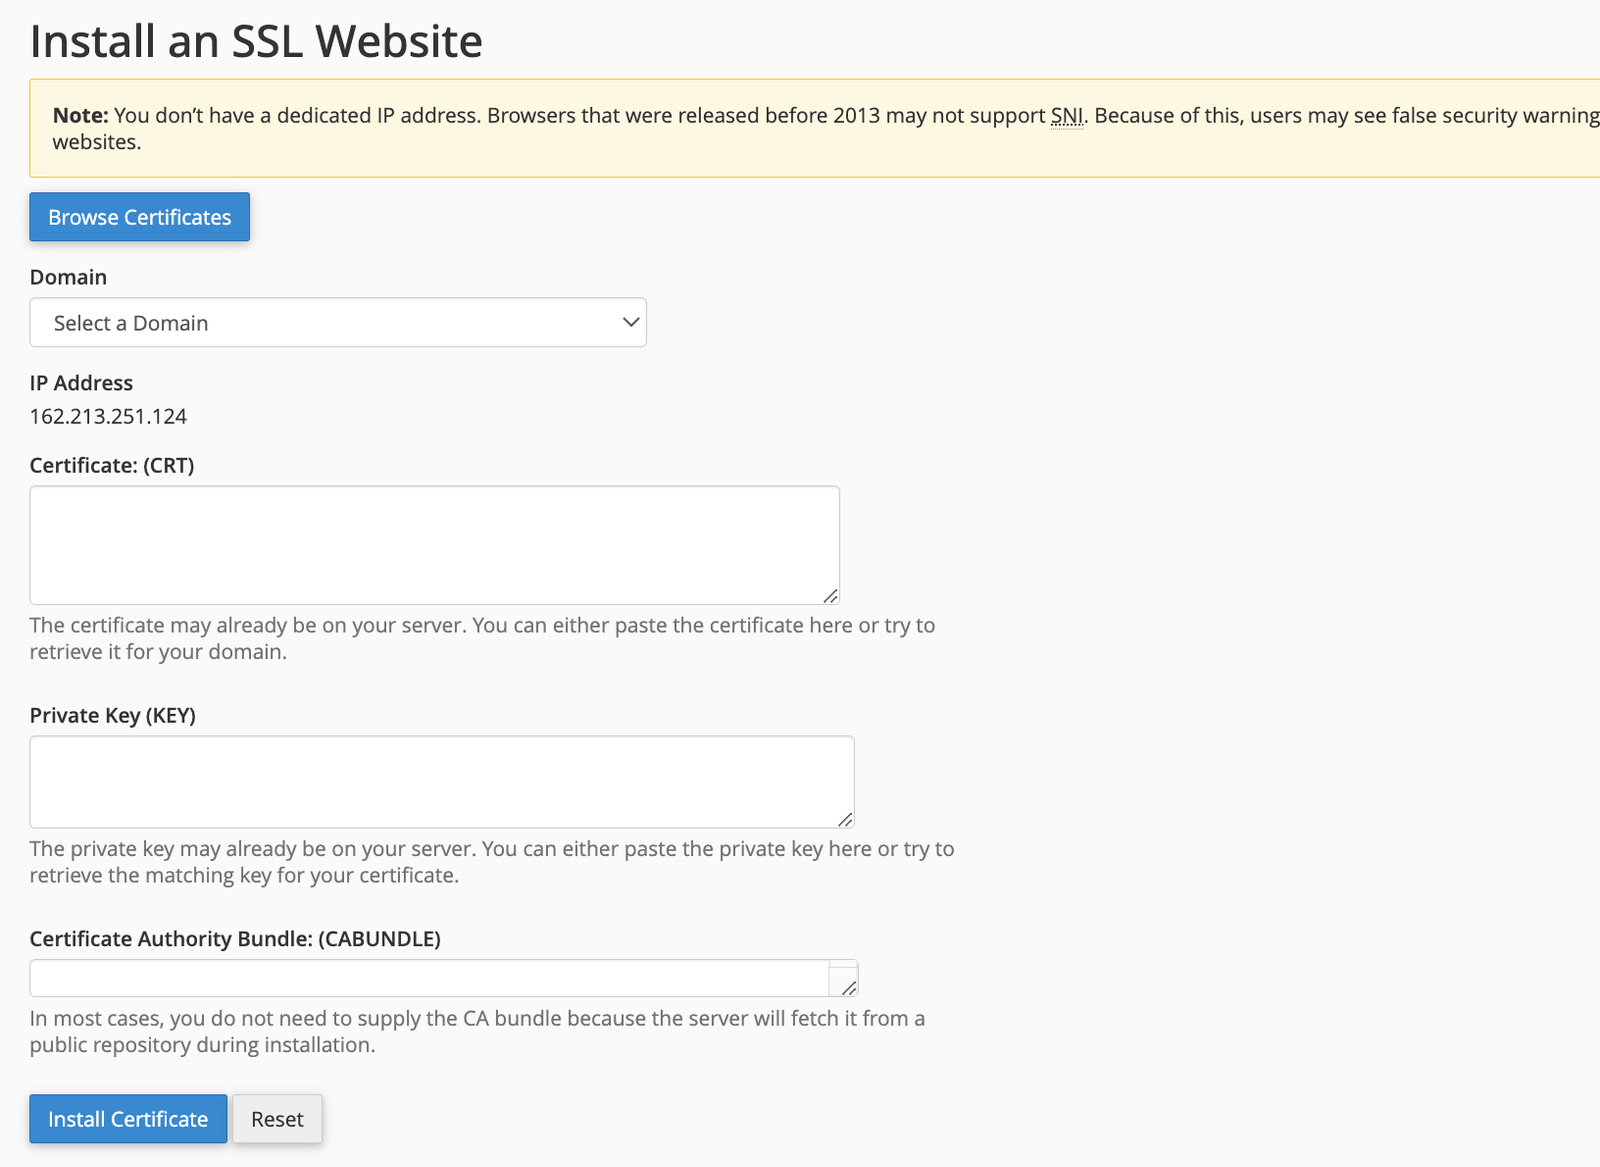
- In your name cheap account search for 'SSL/TLS' and click on it from the search box.
- Click on the Manage SSL sites link.
- Add "cer" and "key" values from the above-mentioned files as mentioned in the following image:
Verify SSL Installation
1. Visit your website using https://.
2. Use an SSL checker, such as SSL Labs, to ensure that the SSL is operational.
Namecheap offers both their free SSL and third-party SSLs such as Let's Encrypt, providing flexibility to meet your needs.


